
Damaged CAD/CAM milling burs will have a shortened life.
As a dental lab invested in digital technology, you want to get the most from your milling burs. Let’s take a look at what it takes to cause notable damage and how to avoid it. We’ll shed some light on the ways milling burs can get damaged and document the scope of that damage in each scenario.
It doesn’t take much damage to affect the lifespan of a milling bur.
The smallest defect in the bur’s cutting edge will become bigger as the bur wears. Any chip, divot, or abrasion in the bur will become a site for wear to propagate from. A damaged milling bur will work just fine for a little while, but it will certainly not last as long as a pristine one.
Accidents happen, so what’s the scope of the damage?
So, you dropped your bur… It’s probably fine, right? Unfortunately, there’s a good chance it sustained at least some damage. It all depends on how and what it hit. But how can you tell? To show you, I’m going to systematically destroy some milling burs and document the results.
How do burs get damaged in the dental lab?
I thought about the most likely ways for milling burs to get damaged in the lab. Here are a few that I came up with:
- Hitting a brass bur holder: It’s surprisingly easy to ding a bur when you install it in your milling machine.
- Hitting other burs: Are your burs rolling around in a drawer?
- Hitting the floor: Hard floors are not a bur’s friend.
How does each one of these affect the bur?
The only way to find out is to test it. I’ve designed a test to see how milling burs hold up to impacts with different materials. It’ll be interesting to find out how much abuse a bur can take before it’s got any visible damage. I’m going to do some controlled impacts of burs into various materials and show you what happens.
The Test:
The idea is to simulate an impact between a bur and these materials: brass, tungsten carbide, and tile – Then I’ll record what happens.
Building the Test Rig:
I needed to assure that the impacts to each material use the same force. After a little bit of research, I decided the best way to do that without fancy lab equipment was to build a simple pendulum. Using the same release point for the pendulum assures a reasonably accurate repeated force.
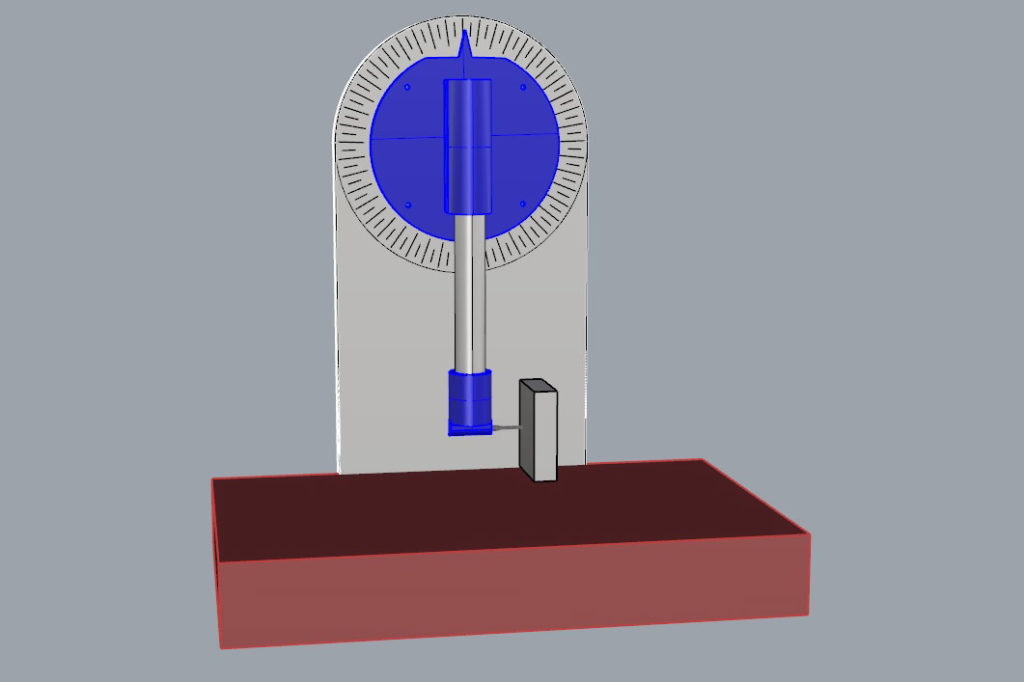
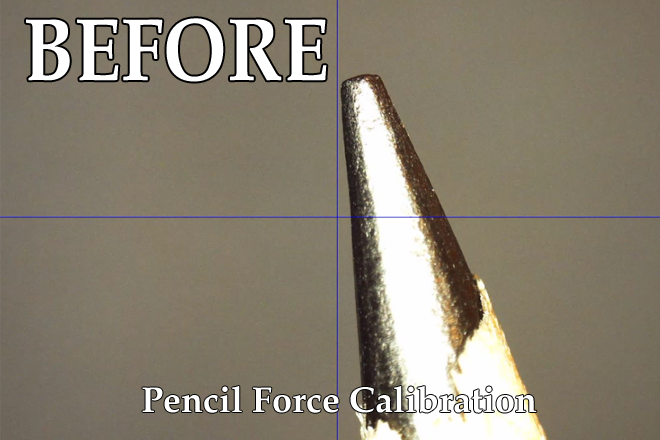
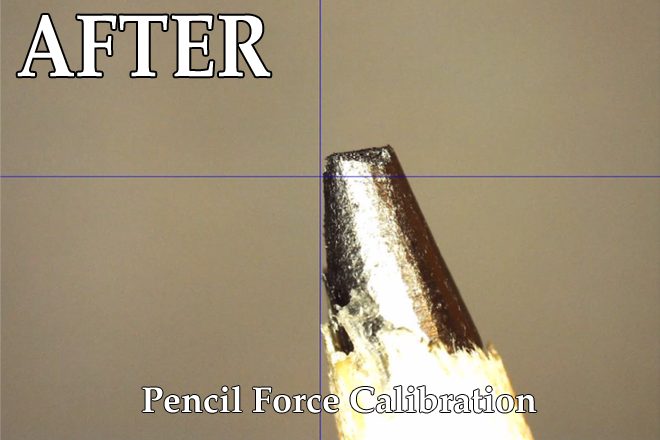
Calibration:
The right amount of force is key. After much consideration, I decided to keep it simple. As a benchmark, I would use the force required to chip the lead on a freshly sharpened number two pencil. I chose this because it’s easy to visualize and it’s repeatable.
I tested the pendulum rig with a pencil until the force chipped the tip. Then, I noted the mark that corresponds to that force. That mark is used as the drop point for all of the tests.
Results:
Test# 1: Bur hitting a brass holder
This one is designed to illustrate the impact between a bur and the brass holder in the mill. It’s easy to press the bur into the holder at the wrong angle or with too much force. It’s important to be diligent with your bur installations. Check out our post HERE for more on that.
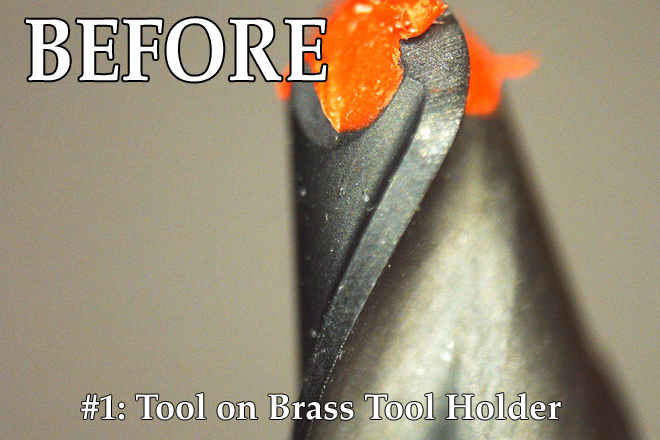
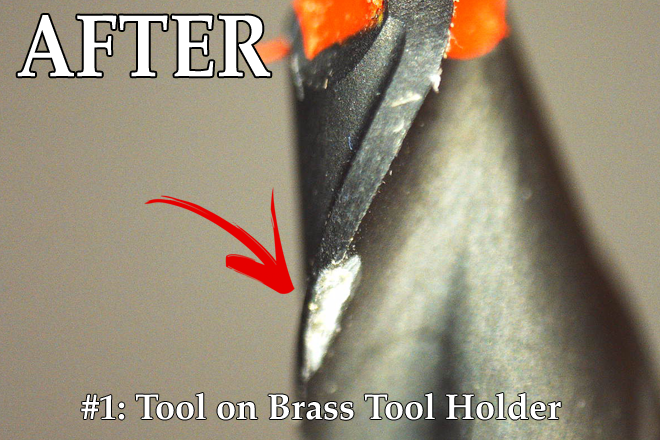
Notice the significant amount of edge damage. Not only is the diamond coating chipped, so is the carbide. This is a fairly predictable result for a carbide on brass impact. This will surely affect the longevity of the bur.
Test# 2: Bur hitting another bur
This impact simulates a scenario where a bur hits another bur. This is most likely to happen if you store your milling burs lose in a drawer. We always recommend storing your burs in the original packaging or specialized bur holder. Check out our post on recommended bur care HERE

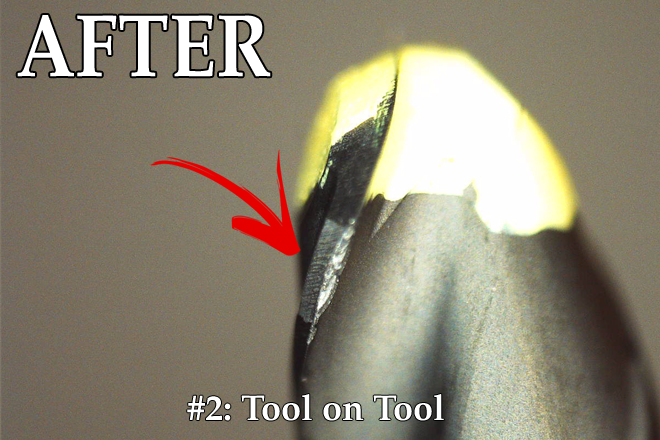
This impact didn’t seem to dent the carbide very badly, but the diamond coating has certainly flaked off. Without the protection of the diamond coating in that area, this bur will surely suffer from a reduced lifespan.
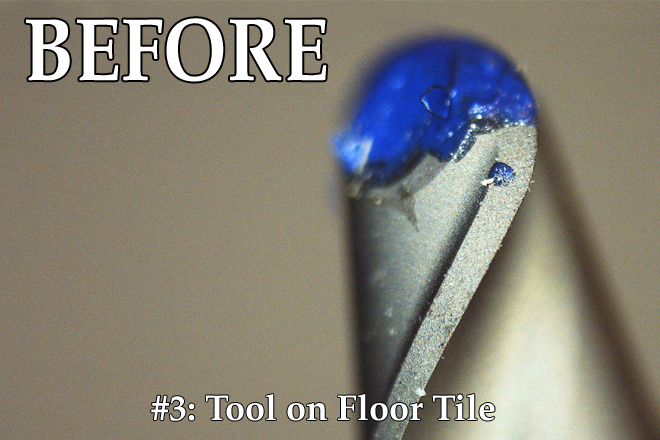
Test #3: Bur hitting the floor
Here we’re testing an impact with the floor. We’re hitting a bur into a small piece of floor tile. The hardness characteristics of tile are much different than metal. Note: This may not be a perfect simulation of a floor drop because a tip impact from standing height would likely have a larger amount of force involved. However, in the interest of keeping the test fair, I’ve kept the force the same.
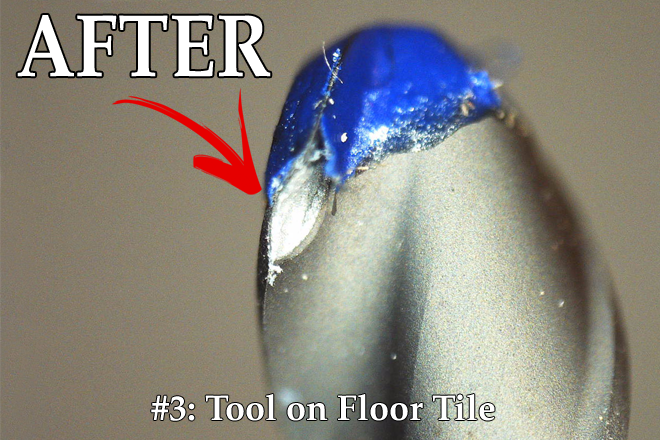
This is by far the most interesting result. I expected somewhere between the carbide and brass tests. However, it appears to be at or greater than the damage caused by the carbide impact. This is definitely a reason to avoid letting your burs hit the floor!
Conclusion:
After running this test, it’s clear to me that any impact with a bur is not good. This is definitely something to keep in mind when you’re working with milling burs in your lab. If you do your best to care for your burs, you’ll insure you get the most bang for your buck.